Hundreds of articles have been written about photography, some good and some awful, the truth is that the amount of photography-related information out there is humongous, which makes difficult to separate the goodies from the garbage. Regarding content, some articles discuss the technical aspects of photography, others concentrate in photo editing and becoming a master in Photoshop, while the rest takes the discussion around good practices and the passion that being a photographer represents.
After searching for a while, we found that there’s not an actual photography guide that you can start with, just several mini-articles and photography websites where many complex aspects are discussed, leaving aside the people that’s just beginning on this field and want to find an user-friendly guide to learn all the essentials about photography.

Today we like to share with all of you a thorough photography guide featuring all the important aspects that any photography enthusiast needs to dominate, from learning all the basics about composition, aperture and shutter speed, to learning how the camera works as well as how to process your photographs before publishing, this article is a huge effort from our team to give you all the key aspects that can help you stand out as a photographer.
Table of contents
- Main Concepts
- Composition
- The Camera
- Illumination
- Photography Styles
- Software
- Advanced Techniques
Let’s begin with the basics
OK class, please sit down that the lesson is about to begin. The first question we should ask is “how do you define photography”?, this question has been answered by many people, some taking the question in a more artistic perspective while others based their response on the technical aspect.
Taken from an artistic perspective, we can say that photography is similar to painting as it is a way of translating an idea into a viewable form, with the difference that painters usually start from zero, while photographers need to find the canvas they want to work with. Both painting and photography contain several technical specifications that the person needs to master, though this is just a complement because after all, creativity is the key for achieving a good picture.

Photo by CharmSchool Photography
Photography has been witnessing a problem that has not affected painting, people is not interested on messing up their clothes with oils and aquarelles, but grabbing a camera is safe and “easy”, which makes people think that having a camera gives them automatically the title of photographer, which is miles away from the truth. The difference between a photographer and an ordinary person holding a camera is that the professional knows about composition, white balance, aperture and more, all these aspects are part of a complete teaching process, which is something that a camera cannot provide by itself.
A technical definition of photography could say that the word photography comes from two ancient Greek words: Photo, for “light,” and Graph, for “drawing”. Thus, you can say that photography is the art of drawing with light. What the camera does is take advantage of light to record a determined scene and translate it into a touchable medium.
Aperture
The first concept that you need to learn regarding photography is aperture. When we talk about aperture, we’re making reference to a small space where light goes by and the amount that can actually pass through that space. The device that controls the aperture in photography is the diaphragm, which allows the person to establish the amount of light that can reach the image sensor (the film back in the old days), this element can be manipulated along with shutter speed to regulate how light behaves.
The f-Number
Defining the concept of F-number in a friendly language is difficult, but let’s give it a shot. We can define the F-number as the diameter of the light entrance in terms of the lens’ focal length, this F-number is divided by the ‘effective’ aperture diameter. Even if you cannot understand all the technical chatter, this is a concept that you’ll be living with at all time, so even if you don’t comprehend the technical aspect of this, you must understand how the F-number affects your photographs.

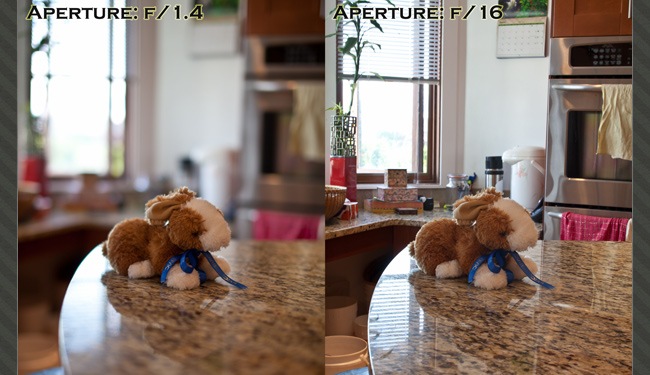
Usually when you buy a camera, the lens comes with a fix set of F-numbers that you can work with. If you reduce the f-number the aperture will increase, allowing more light to reach the sensor, hence if you’re under low light circumstances the best thing to do is choose a low f-number. Most lenses come with aperture values that range between f/2.8 and f/22, though some lenses can go beyond these values.
We know that if you’re new in this photography thing you’re probably saying “OK that’s great, but which value should I use in every scenario?”. To answer this question we can start talking about depth of field.
Depth of field
This is one of the quintessential concepts in photography and is also a concept that if you don’t know about, the camera will take care of it arbitrarily, which can turn out in undesired results. Although the definition of depth of field is based on tons of numbers and mathematic calculations, the idea of this post is showing how photography works in an easy way, so don’t expect to find many equations and things like that on the article.
Depth of field is basically the distance between the closest and farthest objects in a scene that appear sharp enough in a picture. Sometimes a specific scene requires a higher depth of field, e.g landscape pictures, while others require a low depth of field to achieve beautiful results, which is the case of portrait photography (everything seems out of focus except for the person), when you have a large depth of field, it’s called deep focus, while a low depth of field is known as shallow focus. The key to manipulate the depth of field relies on the relation between the focal length and the f-number, hence, the lower the f-number value, the more selective focus will appear.

Photo by Jason Low
There’s an old saying among photojournalists that declares “f/8 and be there”, which means that is more important to be at the right moment than worrying about technical aspects, this phrase indicates that using an f/8 value will usually provide you a good depth of field without having to use low “trembling-hand” shutter speeds.
Another popular concept is the “sunny f/16 rule”, which states that a correct exposure can be obtained on a sunny day by using an aperture of f/16, while the shutter speed should be close to the reciprocal of the ISO speed of the film, e.g. using ISO 200 film, an aperture of f/16 and a shutter speed of 1/200 second. The f-number may then be adjusted downwards for situations with lower light circumstances.
Note: Using a shallow depth of field on your pictures will help you generate the famous Bokeh effect.
ISO
Along with aperture, the other fundamental concept in photography is the ISO. This word stands for International Organization for Standardization, which is the most important regulation system worldwide. Moving on to what we actually care about, ISO measures how sensitive the image sensor is to light, thus at higher ISOs, the image sensor will be more sensitive, giving you the chance to take low-light pictures with more ease.
Because most people (specially non-professional photographers) prefer to shot everything in Auto mode, the camera adjusts the ISO based on its own criteria, which usually works well but sometimes it doesn’t. Increasing the ISO will help you take pictures with little light or in those places where using flashes is not allowed, increasing the ISO will let you take photos without flash and using a faster shutter speed.

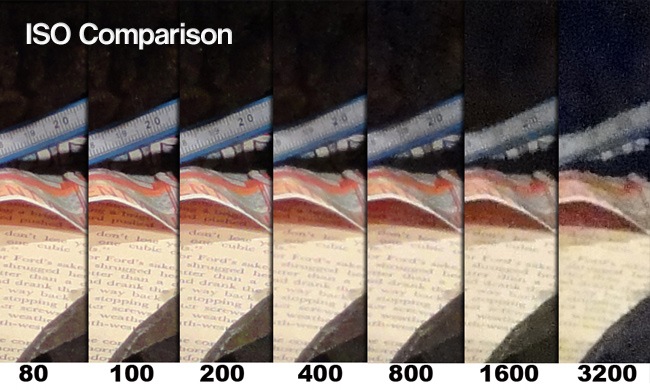
At this point you’re probably thinking “well, in that case I’ll just leave the ISO set to the maximum, period”. Well, on this point is where the trick shows up. By increasing your camera’s ISO, the image sensor will be able to collect more subtle lights but also more subtle noises, resulting in an increase on the amount of grain that the final picture will have. Having this said, the best thing to do is to always use the lowest ISO value possible.
If there’s no chance of using Flash, either because is forbidden or you don’t want to use it, then you can use artificial lights, umbrellas, tripods, etc. If there’s definitely no chance for light’s intensity to increase, then a higher ISO value is permitted.
Shutter speed
The final element of the triad is shutter speed, which is the amount of time that light is allowed inside the sensor before the shutter gets closed. With longer speed values, the amount of light that makes it to the sensor is considerably higher than the amount that finds its way through a short shutter speed.
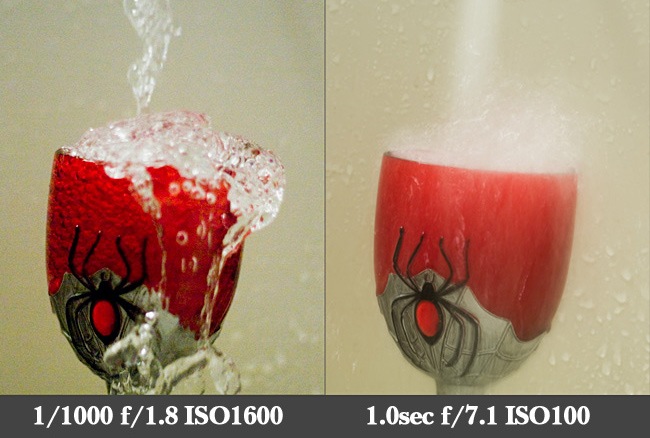
Combining aperture and shutter values will give you the chance of generating beautiful effects and add some blur textures to the picture, this last technique must be carefully executed for not ruining the picture. Shutter speeds can go as faster as 1/4000 (the 4000 part of a second) to slower velocities of 30”, longer periods will be considered as bulb, a technique that keeps the shutter opened for as long as the user keeps pressing down the button.

Photo by Chris Lane
To manipulate the shutter speed value, you can either choose the Manual or Shutter Priority mode, in case that you choose the last one, the camera will display an error message in case that the shutter speed that you’ve chosen will make the final result look over or sub exposed.
If you utilize longer shutter speeds, you can generate the “trembling-hand” blur, so it’s advisable to always keep a tripod next to you. A good tip that will let you know how slow can you go without taking a blurred picture is taking the lens’ length, divide it in 2 and then sum the lens length, e.g 150mm / 2 = 75 +150 = 225, so in case that you’re using a 150mm lens, the minimum shutter speed value that you can use without obtaining any blurred textures is 1/250, in simple words, the shutter speed must be slightly faster than the lens length to avoid blur.
Slow Sync Flash
Once you have mastered the concepts of aperture, ISO and shutter speed, you can start experimenting with your camera to generate some pretty cool things. Among the several techniques that you can experiment with at this point we find slow sync flash, which consists on firing at a slow shutter speed while also activating the flash, this lets you capture the essence of the subject while still preserving some details from the background. If your camera does not have an option to do this, you can simply pop-up the flash manually and it will fire at the moment of taking the picture.
If your camera allows it, try to experiment with rear and front curtain sync, the first one activates the flash at the final moment, right before the shutter closes, while the second option fires the flash immediately after you press the button. These two methods can give you very nice results.
Panning
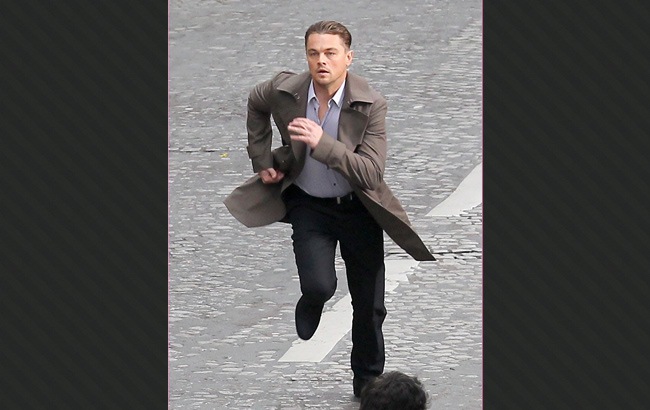
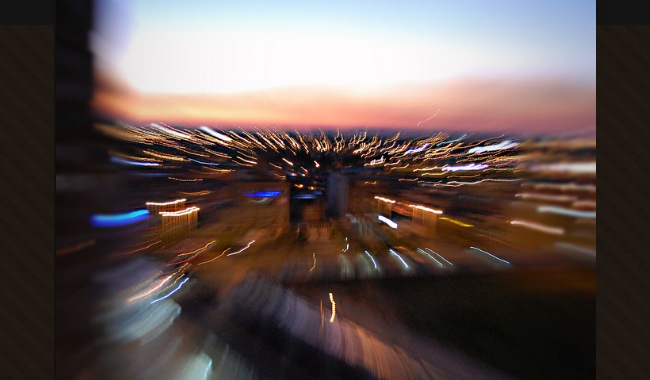
Another great technique that you can achieve with some basic knowledge is panning photography, also known as motion blur. What this technique does is freezing everything in front of the camera except for the moving object, this is a very popular technique that people learn in most photography courses.

To create a panning photograph, you’ll need to follow these next steps:
- Work with Shutter Speed Priority: Using this will guarantee a correct exposure whilst still freezing the subject, it’s recommendable to use this mode because probably you’ll only have one chance for taking the picture.
- Follow the subject: Once the object appears in one of the extremes of the visor, you must press the button and then follow him using the camera until the photo is ready, if you do it right the resultant photograph will be sharp and beautiful.
- Use stabilization: If your camera has a motion stabilization option, make use of it, that will prevent subtle movements from damaging your picture.
- Utilize a lower ISO: By using a low ISO value you will avoid any grain for showing up on the picture, if you can’t make a test picture before the subject arrives, then a value around 400 will probably work.
- Use tripod: By using a tripod, you can move the camera with more smoothness and hence the result will be nicer and more professional.
- Make tests: If you can, place yourself where the photograph is going to be shot and adjust the focus, aperture and just everything you’ll need to ensure that the photo will look good. Making tests will let you take the picture with the certainty that things will work.
Composition, the difference between good and genius
It’s funny that after you learn all the rules and tips that should make of you a good photographer, a small sentence appears saying that “in photography, there are no rules”. The truth is that this statement is not an invitation to shoot at whatever you see, wherever you want and in any way you choose, what this phrase actually means is that there’s nothing wrong in breaking the rules, as long as the result worth the effort.
But before you can start thinking about breaking the rules, you should get acquainted with the basic composition rules that not only apply to photography but to any art field (painting, architecture, design, etc). By learning these rules, you’ll be able to generate lovely compositions, manage hierarchies and give your pictures a professional look; these tips can be applied at any time, from fashion photography to your sister’s sweet sixteen.
Rule of thirds
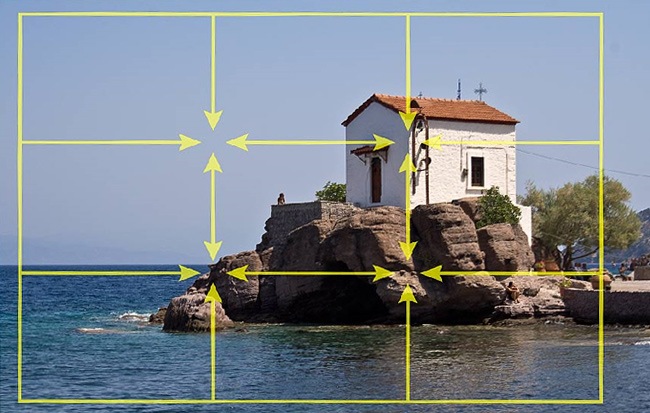
The most popular concept in photography has to be the rule of thirds, an essential concept that any decent photographer knows about. Understanding how the rule of thirds works is really simple, just imagine the visor being divided into thirds, three horizontal and three vertical to obtain a total of 9 parts.

These subdivisions can help you make a better composition in most circumstances, you just need to place the most relevant images over any of these lines or the intersections, some cameras even come with these lines, so you won’t have to imagine them at the moment of taking the picture. The importance of mastering the rule of thirds is to avoid among other things, taking navel (centered) pictures, which is the normal way that people decide to use for framing their pictures. Studies have proven that people actually looks to one of the 4 intersection points before the center, so if you want to highlight a specific element, make sure that you place it right over one of these intersections.
Converging lines
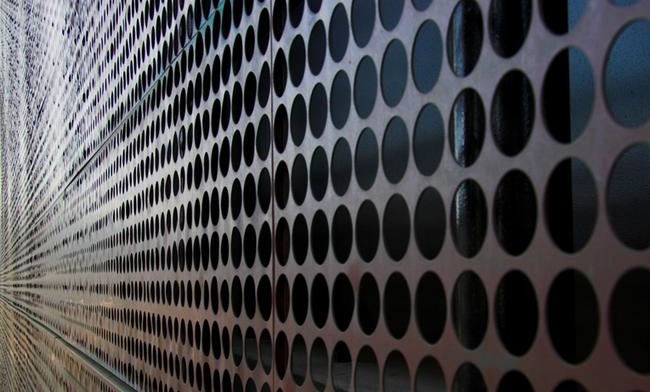
This is a simple and effective technique that will help you highlight certain elements and focus people’s attention to what you actually want they to stare at. Converging lines help the photographer to establish the way that light goes throughout the picture, becoming a subjective path that the person will follow with his eyes, combining these technique with the rule of thirds will help you capture beautiful compositions.

Patterns
As we have patterns and textures in web and graphic design, there are patterns in photography. Using patterns is a nice way of composing without even have to worry about breaking the rule of thirds. You can find many patterns in your daily chore, e.g. bricks in a wall, cars in a traffic jam, people in a stadium, patterns are there and it’s your job to find them.

Composition planes
Also known as flats, composition planes are the different framings that a picture can have, while maintaining a good and attractive composition. These planes/flats have different names, though they’re all the same, now let’s see the most popular photography planes:
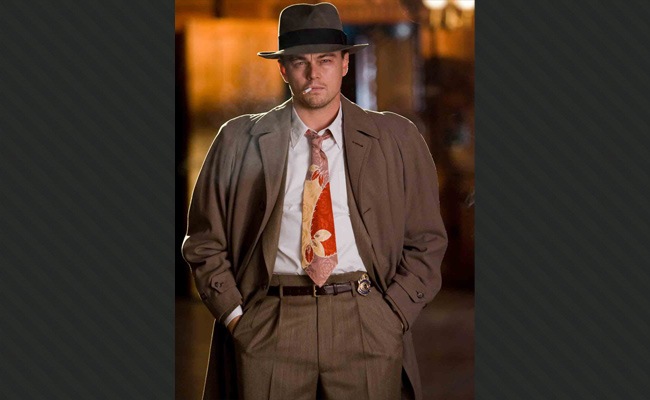
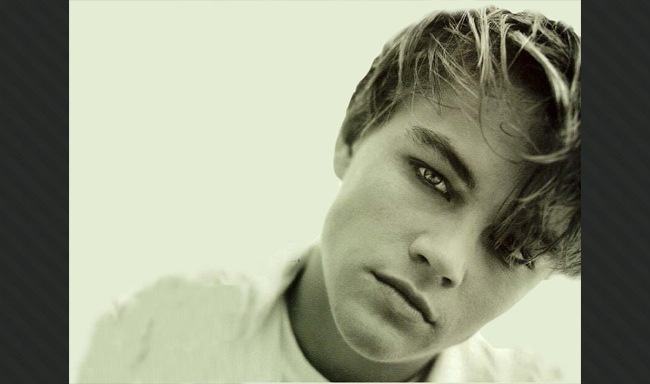
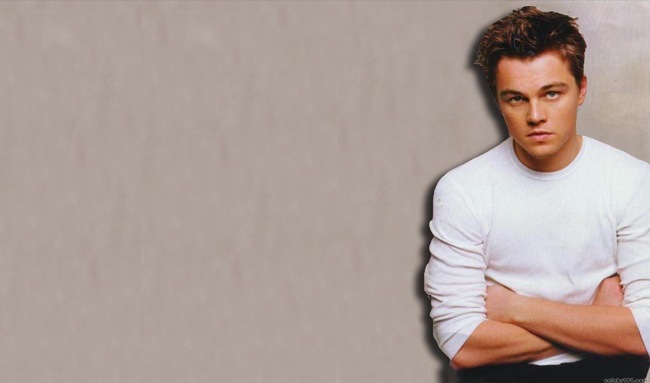
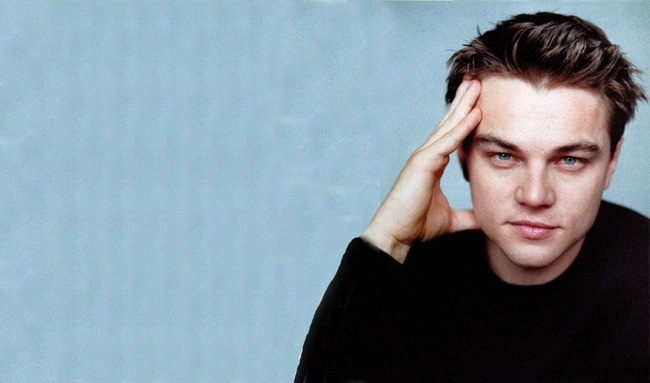
Note: Just for fun we have chosen the same model for all the pictures as a way of showing how the same person can be portrayed using the different planes.
Panoramic plane
This is the largest plane you can have in a photograph and is the most recurrent plan in landscape photography. The difference between this plane and the general plane is that in the panoramic plane you cannot see the small details but the whole scene instead.

General plane
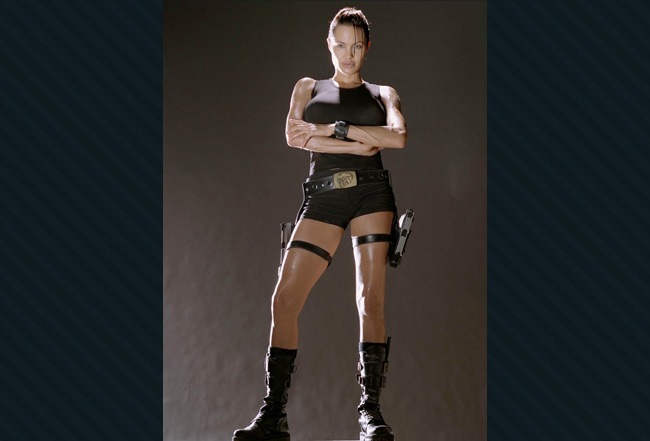
Probably the most popular plane, the general plane features a specific object from the top to the bottom, without cutting any parts of the subject. Everytime you take a picture of a person and you can see his head and his feet, then you have made use of the general plane.

American plane
Also known as 3/4, this plane was specially popular on the old western movies where it was important to highlight the guns that cowboys used to carry below their waists. This plane is useful when you have several people in a picture and you need to reduce space without removing much of people’s details.

Dutch plane
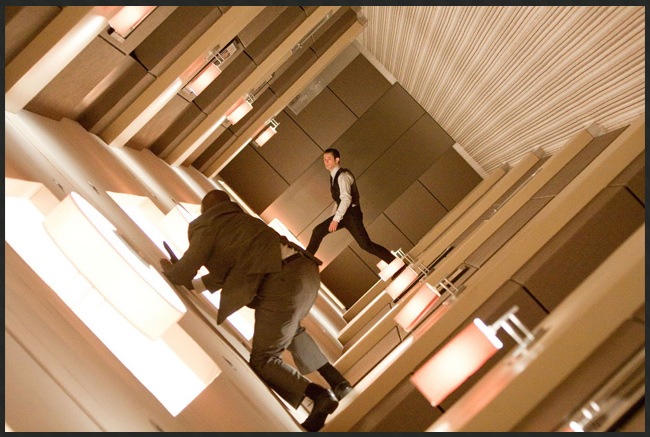
A very popular plane since the nineties, the Dutch plane tilts the camera sideways so the horizon points right to the bottom of the picture. This is particularly popular in action films when the director wants to give more importance to a specific scene or character.

Midplane
Very popular in fashion photography, this plane cuts the subject by the middle, focusing the attention on certain details. As an example, you can take a person’s picture from his head to his waist (American plane goes down to the knees) and thus, you’ll be using the midplane.

Midplane short
Also known as bust plane, this plane splits the subject in half and then in half again, leaving in the case of people a picture that goes from the head to the middle chest. This plane is very popular in portrait photography as it concentrates the attention on the subject by removing most of the background.

Close-up
Also known as foreground, this plane reduces the visible area to the person’s face and going at the most to the shoulders. Close-up is used for highlighting expressions and small details that with other planes will be harder to notice, this plane also generates a nice sensation of intimacy, which is something that many photographers try to achieve in their work.

Spotlight
Some photographers also call this ‘primerissimo plane’, this is the closest level that a photograph can reach and unlike the close-up, this plane no longer provides an intimacy vibe but on the opposite, it evokes a strong feeling that invades the subject at the deepest level, which is something useful for generating strong emotions and expressions. This photography plane is used to highlight very punctual details and generate interesting compositions.

Map detail
Unlike the rest of the planes, we cannot give you an exact reference about how much area does this plane cover. Map details are used to highlight specific parts of a picture that are not commonly shown, e.g. a hand or a toe, though they can also be used to highlight very punctual spots. This plane is often associated with macrophotography, which is a concept where through some special lenses, the photographer is able to capture tiny elements.

Composition angles
Along with composition planes we find composition angles, which are less than the planes but even so are very important for generating emotions and creating very interesting compositions. Although many experts consider several angles, we decided to simplify things into 3 main angles that you’re going to read about now.
High-angle
When a picture is taken above the subject’s eye line we can say that we’re talking about high-angle pictures. This kind of angle puts the camera above the subject and from there captures the scene. This angle is often used to generate a feeling of fragility or vulnerability and therefore, it adds a lot of emotion to the portrait.

Low-angle
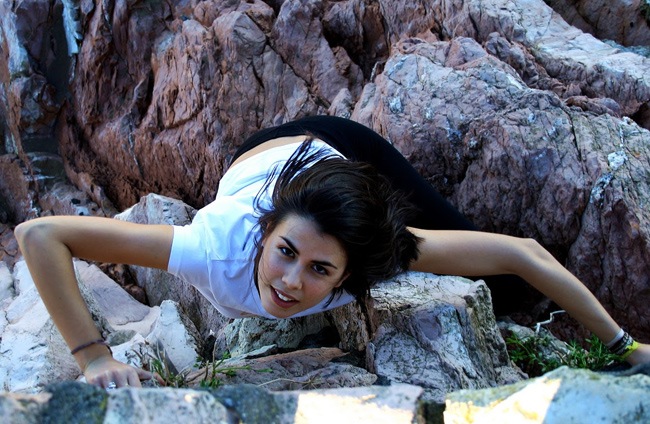
On the other hand we find low-angle pictures. This angle places the camera below the subject on the vertical axis, thus, anywhere below the eyeline, looking up picture can be considered as low-angle. This angle has the exact opposite effect that high-angle generates, as it evokes a sense of superiority and power. Many action films have made use of this angle to enhance the power of some characters.

Bird’s eye angle
This angle goes beyond the high-angle as it places right on top of the subject. The perspective obtained by using this angle is minimal, making the subject to appear out of scale; this angle is helpful to portrait the complete environment of a scenery or to make the character look even weaker and more fragile than when using high-angle.

Meet the camera
Now that you know all the basics for creating great compositions, it’s time to meet the device that makes everything possible, the camera. The term camera has its origins on the Latin term “camera obscura”, which was an early mechanism for projecting pictures, it was after the original concept of camera obscura that modern cameras were born.
In simple words, a camera leverages the light of the visible spectrum or other sections of the electromagnetic spectrum. Similar to “camera obscura”, a camera consists of an empty space with an opening (known as aperture) in one of the extremes that allows the light to enter, while the other extreme contains a recording surface where light gets captured, of course this is a rough explanation as there’s more science behind a camera. Every time the user presses the shutter, the curtains open to let the light penetrate and gets recorded, the amount of time and light that enters the camera can be adjusted by modifying the shutter speed and aperture values.
During the early years, cameras were complicated devices that only professionals were able to handle. People was able to find different films and filters to generate beautiful pictures. Now everything has change with the boom of digital technology, photo films are no longer used as everything is being recorded in tiny memory cards that can store hundreds of pictures (the old films were able to store a maximum of 36 pictures normally).
Although the major camera companies have been developing fabulous cameras with tons of features and styles, these companies have been forced to deal with another technologic revolution, mobile devices. Now every person has a portable camera on his mobile, making people think that they’re now qualified photographers. Although the truth is that a good photographer does not rely on expensive cameras, mobile cameras have caused a major damage to the photographer profession.
Mobile cameras
According to studies, mobile cameras will become the most popular way for taking pictures in the upcoming years, therefore it’s important to dedicate a section of this article to discuss phone cameras. Since the begin of the 21st century, cameras began to find their way into mobile phones and now they’re just another component that any decent mobile must have.
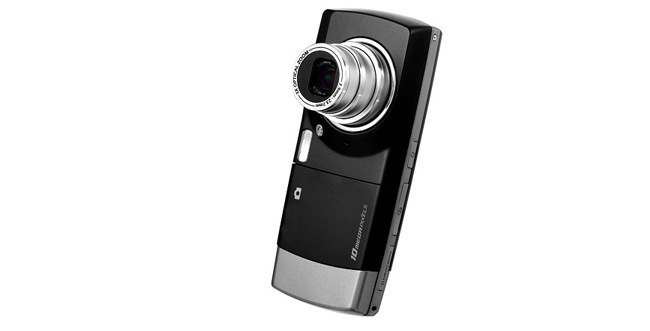
Unlike digital cameras, mobile cameras are simpler and with less features. Usually you cannot adjust the focus manually as it comes fixed, things like the aperture and shutter speed are also unavailable in most phones. Although mobile cameras technology is improving every day, they’re still no match for digital and professional cameras, however, devices such as the BlackBerry Torch, iPhone, Nokia N8 and others have really impressive cameras considering the fact that they’re just a complement and not an individual product.

Despite all these disadvantages in front of digital cameras, the truth is that camera phones offer certain things that makes them valuable and popular. Some of the aspects why mobile cameras have become so successful are their low price, compactness (which makes them easy to hide) and integration with mobile phones (you can have two devices in one). Another aspect that make mobile devices so popular is their integration with mobile applications such as Foursquare.
Recommended devices
At the moment of purchasing a new mobile camera, it’s important to remember that no matter how good the camera is, it will never be a rival for a digital and less a professional camera, however, in case you’re thinking about buying a new cellphone with a decent camera integrated, here’s our recommendation of the 10 best mobile cameras until this day, you can leave us your opinion on this subject at the comments section.
Digital cameras
There’s practically no family that does not have a digital camera for recording all the special moments. Digital cameras are one of the major inventions of the recent decades and the reason why photography has gone mainstream. A digital camera works similarly to a normal camera, with the differences that pictures are not recorded on a surface but on an electronic medium.
If we compare classic cameras against digitals, we can easily find some major differences. Unlike old cameras where you needed to reveal the film in order to see the results, digital cameras let you see every picture you take immediately, saving time and letting you know when a picture has been mistaken. Another difference is regarding storage, which passed from a maximum average of 36 using traditional films to hundreds and hundreds utilizing memory cards. Digital cameras can also record video, which is something that old cameras would never be able to do, finally, you can edit your pictures directly on the camera, which is more effective than going to the dark room.

Digital cameras are not professional cameras but neither mobiles, which means that they have more features than phone devices but still have less maneuverability than professional devices. Digital cameras are ideal for the average user, as they generate quality pictures while offering all the essential settings that every person might need.
Although most of digital cameras come in compact versions, you can purchase bridge digital cameras, which is the closest you can get before acquiring a professional camera. This category of digital cameras have more features than average digital cameras, while preserving certain aspects such as the fixed lens, small sensor and having to preview using the LCD screen. The easiest way for differentiating a bridge camera and a professional D-SLR is that the bridge camera is not reflex.
Resolution
One aspect that you need to pay attention when buying a new digital camera is resolution. This element is measured by millions of cells that count the number of photons that reach the electronic sensor. An image resolution can be measured by the amount of pixels that the resulting image has, hence, a 640 x 480 image has a total of 307.200 pixels.
The problem with resolution is that most retailers try to sell this pixel number as the actual resolution, so be careful dear friend because there’s more to know about resolution. Other aspects that affect resolution are sensor size, lens quality and other less relevant facts. If you establish resolution based on pixel count only, you can end up with a camera that takes enormous pictures with a high amount of noise, this happens because small sensors are filled with more cells than what they can actually support.
Once you have purchased your digital camera there’s something else you need to know, and that’s the difference between real and virtual pixels. When you activate your camera’s zoom, a small bar will show up in one of the sides of the screen and after a certain point, it will change of color or present some kind of change, what this means is that before the change, the camera is able to generate actual pixels based on what it’s actually seeing, but once you cross the limit, your device will try to “imagine” the missing pixels to fill the empty spaces (this is often known as interpolation), which often turns out in noised photographs.
Regarding zoom in compact digital cameras, lenses usually come with values of a 3X, 4X, etc. This value makes reference to the ratio between the longest and shortest focal lengths. You must understand that having a larger zoom designation does not necessarily mean that the image can be magnified any more (since that zoom may just have a wider angle of view when fully zoomed out). Additionally, remember what we said before about real and virtual pixels.
Suggested cameras
If you’re planning on give your family a new digital camera for the next vacations, here’s a short list featuring some of the best digital cameras until this day. Some of the aspects that you must assess at the moment of acquiring a new digital camera are the number of megapixels (remember to ask if the given value is the actual pixels or just the virtual value), what kind of batteries does the camera work with, additional features and specific functions that you’re looking for.
D-SLR cameras
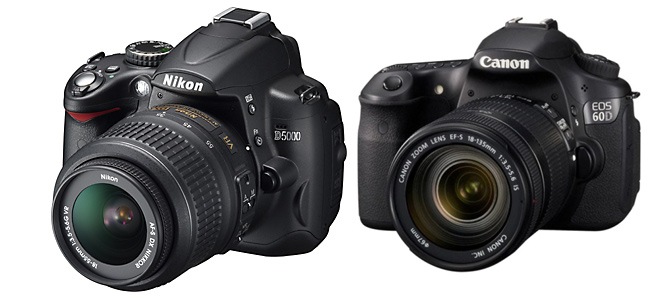
And finally we have the elite category and where most professionals can be found. D-SLR stands for digital single-lens reflex cameras and are basically the maximum development in digital photography. These cameras utilize a mechanical mirror system and a pentraprism to direct light from the lens straight to the optical viewer on the back of the camera, until this point the functionality is exactly the same that classic SLR cameras have (what you see is what you get), so the actual difference is concerning storage and additional functions.
Now let’s try to understand how reflex cameras work. First the mirror reflects the incoming light through an attached lens upwards at a 90 degrees angle, then the light is reflected thrice by the roof pentaprism, fixing the image before it reaches the photographer’s eye. The rest of the process works exactly like all the other kinds of cameras, the curtain opens and closes, allowing a certain amount of light to reach the sensor and get recorded.

There are two main reasons why professional photographers prefer D-SLR cameras. The first reason is that the reflex system gives a precise preview of how the picture is going to look like (all the other cameras present a certain displacement that needs to be surpassed manually). The second reason is that D-SLR gives you the chance of work with interchangeable lenses (zoom lens, wide lens, etc).
High definition video
Since 2008, a new generation of D-SLR was born, with the capacity of recording high definition video. This feature was first introduced on the Nikon D90, which can record video at a 720p resolution (1280 x 720), then all the other companies began manufacturing similar cameras and now most D-SLR cameras have the option of shooting HD video.
Sensors
The next aspect you should probably know is regarding sensors, until this moment you can find two main kinds of sensors, CCD and CMOS. The first category is CCD, which stands for charged-couple device, these sensors are used in most digital cameras and many D-SLR. CCD sensors produce high quality images, although cameras equipped with this sensor tend to be more costly and consume more power than other types.
On the other hand we find CMOS (it stands for Complementary Metal Oxide Silicon). These sensors are larger than CCDs, which makes them capable of perceiving more light, therefore CMO sensors are more sensitive and produce even better images than CCD. These sensors are simpler, less expensive and employ less power than others but also have a bigger size, which is the reason why cameras with this sensor tend to be bigger. At the end both sensors work really well, so it’s up to you to decide which one is the fittest for what you’re looking for.
Regarding size, sensors come in three main sizes: Four thirds, APS and Full Film Format. The smaller sensors are often used in simpler cameras, while the larger ones are often found in D-SLR cameras; the size of the sensor affects the image quality as well as the camera options. The sensors with a size close to the 35mm film format are known as full-frame sensors and allow you to use lenses without worrying about focal length magnification as well as obtaining top quality pictures whilst using your D-SLR.
Best D-SLR cameras
Finding the best D-SLR cameras has a lot to do with how much do you have in your pocket. We can say that there are low, medium and high gamma D-SLR cameras, some with additional features, others with better sensors but in the end, almost every D-SLR camera is a guarantee of a quality product that will let you capture great pictures at the highest quality. We have made a quick search to help you decide which D-SLR to buy and here it is, our top ten of D-SLR cameras:
Lenses, which one to choose?
What we have seen so far only involves the body of your camera, now let’s see what happens with the other part of our machine, of course we’re talking about lenses. There are many types of lenses and understanding their usage will help you determine when and how to use them to shoot the most impressive photographs.
From the simplest to the more complex, all cameras contain lenses made out of several elements that individually direct the light gleam to recreate the image as precise as possible on the digital sensor. A good lens will manage to reproduce the image with minimum aberrations, while making use of the less amount possible of expensive elements. An optical aberration happens when at some point the image is not properly translated onto single points after passing through the lens, generating things like blur, low contrast, chromatic aberration or vignette.
There’s one aspect that can vary depending on the type of lens you use, the focal length. If you utilize a wide angle lens, the subject will have a wider perspective, while using a telephoto lens will give you a flattened perspective. Another factors that can affect the focal length is the lens size, using a telephoto lens will have more possibilities of generating a trembling-hand effect due its weight, which is something that will rarely happen when working with wide angle lenses.
Regarding the manufacturer, the best references for you to buy your lenses are Tamron, Nikkor and Canon. Any of these options will give you a top quality lens for your camera.
Zoom and Prime lenses
Before submerging into more specific categories, we can classify lenses in two main categories, zoom and prime lenses. Zoom lenses give you the chance of alter the focal length, allowing you to obtain different compositions or perspectives from a single point, this is very useful for cases where you cannot get any closer to the subject for one or another reason.

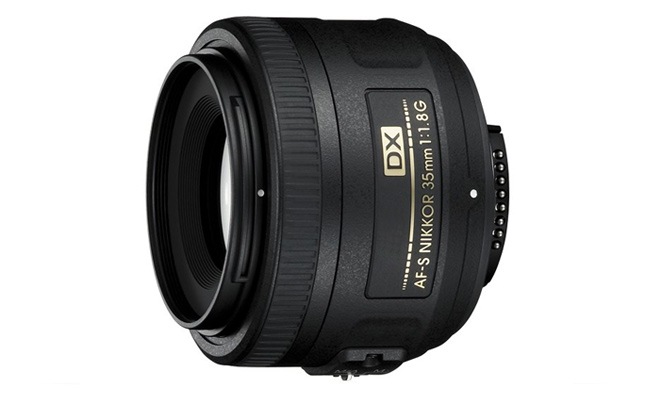
We also have prime lenses, this type of lenses differ with zoom on the fact that they have a fixed focal length, probably you’re wondering “then why should I use a prime lens?”. The reason why prime lenses have not disappeared is that they produce better pictures in terms of quality, though this can only be noticed by the experts or in a humongous print. Prime lenses are also less expensive and easier to carry as they’re generally smaller than zoom lenses, another advantage is that prime lenses usually have larger maximum apertures, which means that you can shoot better pictures in low light situations.
When you’re buying a new lens, is extremely important to check the maximum aperture available because this value will let you know how much can you do in low light events. Having a lens with a larger range of aperture will give you more freedom at the moment of taking a picture; situations such as indoor events or portrait tend to require larger aperture values in order to highlight the subject by reducing the depth of field.
Telephoto lenses
Once you have acquired a decent camera, the next thing that most photographers do is start buying new lenses to increase their possibilities at the moment of shooting a picture, probably the most famous lens is the telephoto, so let’s see how this lens works and how can you harness it.
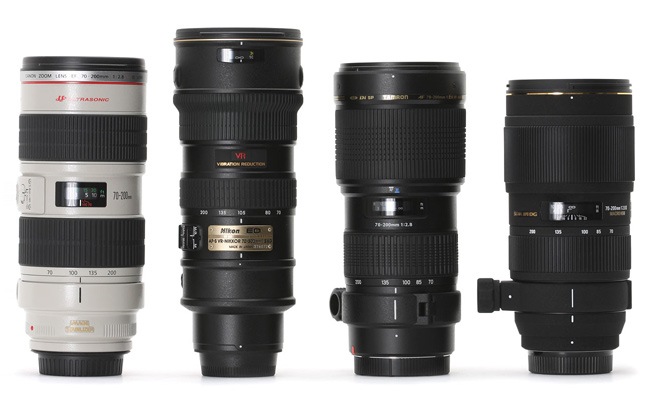
Telephoto lenses are known for help people enlarging distant elements, but there are other uses you can give to these lenses to generate beautiful pictures. A telephoto lens can normalize the distance and size between near and far objects as well as reduce the depth of field. These lenses are ideal for wildlife photography, landscapes and eventually fashion portraits.
You can say that a lens is considered as “medium telephoto” when the focal length goes beyond 70mm, while a “full telephoto” is the one that passes the 135 millimeters. An important fact is that using telephoto lenses translates in a reduction of the view angle, thus you might require a special adapter to fix the issue. Thanks to the capacity of narrowing the angle of view and normalizing size and distance, you can make distant elements seem similar to the closer ones, using a telephoto lens will give you the chance of generating more accurate scales, this however requires some careful because if you make everything look the same, you’ll end up with a lame and boring photograph.

The magic of telephoto relies on the fact that you can take a picture without being noticed, this is very useful for those situations where you don’t want to affect the scene as some people and animals tend to act different in front of the camera. A good trick for taking advantage of telephoto lenses is shooting at sceneries with multiple layers, which can help you generate much richer textures.
As we’ve said before, the problem with big lenses is that they’re harder to hold due their weight, resulting in the trembling-hand effect. To correct this, try using a larger aperture to be able to increase the shutter speed, it can also be useful to carry a tripod along your equipment. Another good trick is to hold your breath and immediately shoot the picture, in that moment your body will be steadier than before.
Wide angle lenses
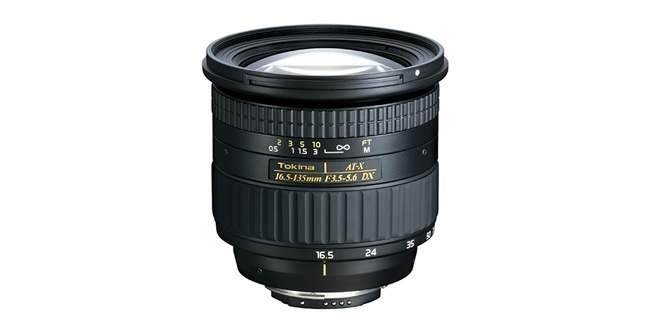
The second lens that any good photographer should have is a wide angle lens, an amazing tool for overdoing depth and relative size in a picture. This lens is only recommended for advanced photographers as it’s one of the most difficult lenses to work with. Everytime you find a lens with a focal length below 35 mm you can say you’re staring at a wide angle lens, these lenses can have view angles beyond 55 degrees, which makes them great for capturing wide sceneries. Although must people think that wide angle lenses are used for getting more distance from the subject, the truth is that they’re really good in getting you closer to the subject.
Why are these lenses hard to use?, the reason is that they distort relative size and distance when comparing near and far objects, which means that without control, your photos can finish with an unpleasant look, so if you’re planning to take a portrait using a wide angle lens, make sure that you’re 100% sure of what you’re doing. These lenses are often utilized for adding emphasis to punctual elements within a picture or generate extreme selective focus photographs.

A good practice that will help you take correct pictures when using these lenses is to always point to the horizon, never below nor above, because that will cause parallel vertical lines seem as if they’re converging. This trick of making vertical lines to converge can give you beautiful results as long as you plan things carefully.
Some of the uses you can give to wide angle lenses are picturing landscapes and tall elements such as trees or buildings, the lens will make the objects look bigger than what they actually are. Another use for these lenses is in indoor spaces where you cannot increase the distance between you and the subject. Wide angle lenses are more susceptible to lens flare than the others because the sun have more available area to invade the composition, so try to use protectors or any element that can isolate the picture effectively.
Fisheye lenses
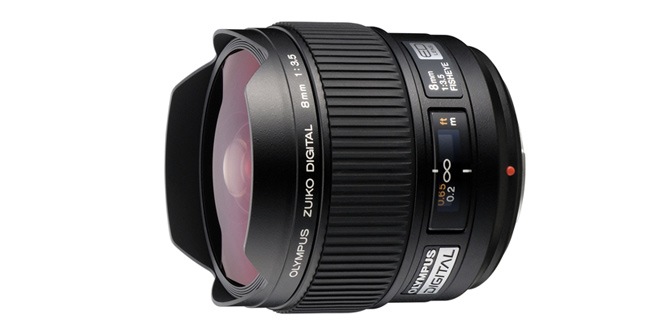
Inside the wide angle category we find a special section of super wide angle lenses commonly known as fisheye lenses. These lenses have the ability of generating super wide, almost spherical pictures; these lenses were originally developed for meteorology usage, but it was just a matter of time before photographers adapted as a favorite. The usual focal length of a fisheye lens goes around 9mm for circular images and 15 for full-frame.
Using these lenses will highly distort perspective, which is the reason why they’re only used by artists and experimental photographers, otherwise we suggest you to stick to a regular wide angle lens.

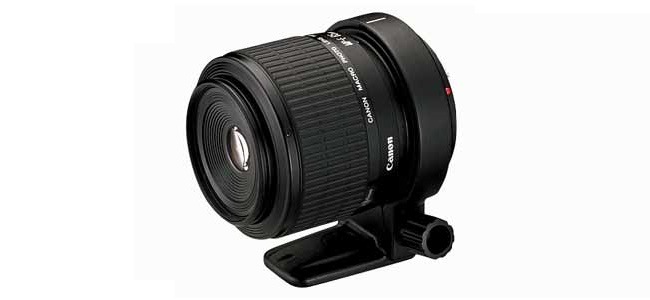
Macro lenses
The most exclusive group of lenses and the one that only experimented photographers can work with is macro. Macro photography is an amazing technique that lets you visualize things that are almost impossible to see with the naked eye. The reason why we said that only experts can work this technique is because you must manage concepts such as depth of field, sensor, magnification and diffraction almost perfectly.
Magnification makes reference to the size an object will display on your sensor in comparison to the actual size, e.g. if the image displayed on your sensor is 25% larger than in real life, then the magnification value will be 1:4 or 0.25 X, therefore, at higher magnification values, smaller objects can fill the image frame. This concept depends of two main lens properties, the focal length and the focusing distance, regarding the focal length, a higher value (more zoom) will grant you more magnification, even if the minimum focusing distance does not change, the focusing distance establishes how closer can you get to the object without losing focus, so the closer you can get, the higher magnification you will have.
Diffraction is an optical effect that limits the resolution of your photographs by generating a certain level of distortion, no matter how many megapixels your camera has. Images are more susceptible to diffraction as the f-number increases; at high f-number settings, diffraction becomes greater and begins to affect image’s resolution. After passing that limit, any subsequent f-number increase will only decrease resolution.

A lens can be considered macro when it’s able to capture an element in a scale of 1:1, though many people consider close-up pictures as part of macro photography. To force a camera lens to keep focusing as you’re getting closer, the lens apparatus must displace further from the sensor. Once you reach magnifications of 0.25X, the lens will be too far away from the sensor and begins to act as if it has a longer focal length. A problem that might show up when approaching to the subject beyond the minimum f-number is that the camera may lose its autofocus capacity, this problem is automatically fixed in case that you’re working with Nikon cameras.
Keep in mind that at higher magnifications, all the imperfections of your lens will begin to reveal, including chromatic aberrations, distortion and blur. This happens specially when you use a normal lens to make macro photography, a good macro lens will show up a minimum amount of imperfections at even the highest magnification numbers.
Using light at your benefit
This is probably the most complex theme in photography because every photographer has a method of his own for illuminating a scene. So far you have learned how to take advantage of light for taking pictures, but when the natural circumstances complicate the shooting you will need to illuminate.
In a normal photo shoot, the only thing you need to control light is your camera. Controlling the aperture, ISO and shutter speed will allow you to work with different light intensities, however, there are occasions where your eyes see things properly illuminated, but at the moment of taking the picture, it turns out that the camera is registering a much darker image than what your eyes are seeing, this happens because your eyes are able to compensate the different light values whereas the camera cannot. Now, to understand how to work with your camera’s “eye” and generate well illuminated pictures, you’ll have to learn a few essential tips.
Sunlight
When sun is the only source of light you have to work with, is very important to use it at your favor. The first thing to do is always be aware of the sun’s direction as well as the hour, doing this will help you anticipate the best moment for taking a picture. The ideal scenario is having the sun at your back because that will properly illuminate what’s in front of your lens, reducing things such as backlighting.
If you have a case where the sunlight is ruining your composition, try to look for other angles and generate new compositions, usually more than one angle works to create beautiful photos. Another rule of thumbs is avoid taking noon pictures, that’s the moment when the sun reaches its higher point and therefore it will flatten your photographs.

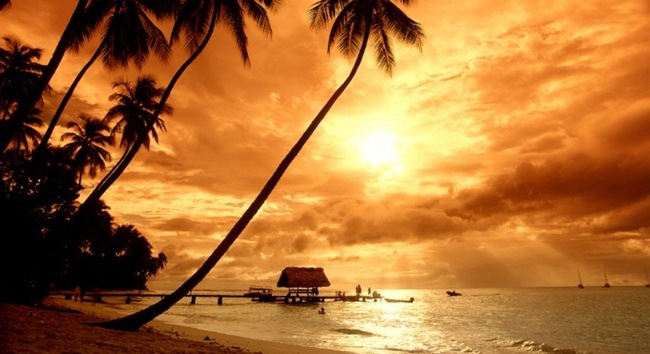
The best moments for taking outdoor pictures are definitely sunrise and sunsets, these moments will give you tons of options regarding lighting, you can generate softer silhouettes and play with shadows. Remember that even if the light conditions are excellent, you must adjust the aperture and shutter speed values to obtain the result you want.
Flash
Loved and hated, flashes can save or kill a picture depending on how they’re used, whether if it’s in outdoors events or studio photography, knowing how to properly use the flash is something that every photographer needs to know. Most cameras come with a built-in flash, which is usually all you ever need unless you’re taking highly professional pictures; built-in flashes have the problem that of being feed by a small battery, which prevents them for shooting in long periods. A normal flash works like this: The camera measures the time length that the flash is fired by measuring the exposure, so as soon as the sensor indicates that you have reached the best exposure possible, it will turn off the flash.
Despite the fact that your camera flash will always try to compensate light as the subject steps away, this compensation isn’t infinite, so if you fire beyond the limit, all you’re going to obtain is an underexposed picture. To find out how far can you shoot using your camera’s flash you can check the manual, though we can say that regular digital cameras often have a reach around 14 feet (4.2 meters). This value can change under different circumstances, e.g when you shoot in an indoors location, the light that’s coming out from the flash will probably bounce, lighting up the entire room.
Just like there is a maximum reach value for your flash there’s also a minimum distance that you need to know about. If you go beyond the minimum limit what you’re going to obtain is the classic “mime” effect, which is an awful result that will ruin your photos. Usually the minimum distance for not messing up the subject goes around 8 feet (2 and a half meters). In case that you have a background on the picture that will add some texture to the picture, make sure that the subject is closer to you because if he’s laying against the wall, the subject will look flat on the final picture.

If you’re working in low light conditions where you must use a shutter speed below 1/60, we suggest you to activate the flash in order to prevent the trembling-hand effect for showing up, you can also use a tripod, though if you’re shooting a model, he will probably move and hence ruin the picture, so in that case it’s better to use the flash.
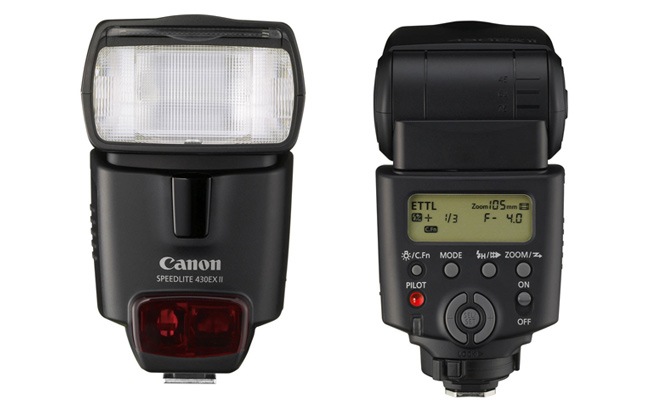
If you have purchased an elite camera, it’s probable that it will come without a built-in flash. This happens because built-in flashes can affect the camera’s image production quality. On this case an external flash may provide a better control over the lighting and exposure of the subject in most situations. If you have Canon EOS series DSLR, you should buy the 580EX flash or if you want something less expensive, the 430EX works really well. In case that you’re more of a Nikon fan, the best flash you can put your hands on is the SB600.
Useful trick: If you have decided to work with your camera’s built-in flash, an effective and cheap way of smoothing lights is placing a translucent paper on front of it, that will soften the light and give you better results, though you must remember that this change is going to affect the exposure.
Correcting backlighting
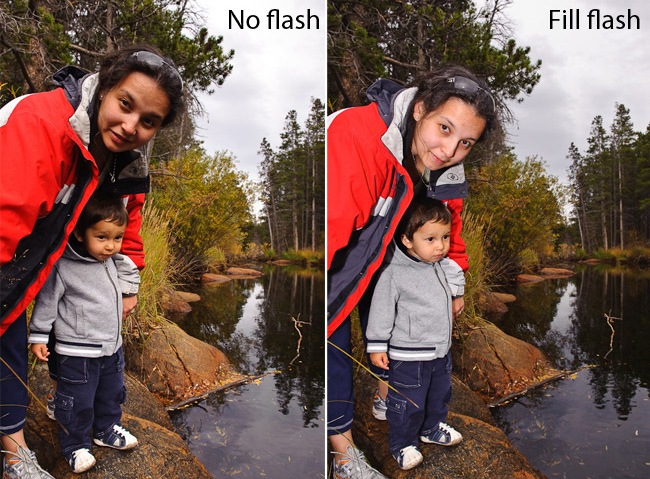
One of the most common mistakes that amateur photographers commit is taking backlighting pictures. If you shoot a picture with the sun standing behind the subject, the model will act as a wall, making the light to reach the camera without covering the model, therefore you will obtain a dark silhouette of the subject. To correct this error, you can utilize two basic tricks, fill flash or exposure correction.
Fill flash
One of the ways of using the flash at your benefit is the fill flash technique. When you have situations where the light is really strong and is generating a lot of shadows, you can make use of fill flash. Using fill flash can help you compensate the backlighting effect, keeping the background properly exposed and highlighting the subject. This is definitely a great technique for adding balance to your pictures, though it’s important to remember things like flash distance and exposure before shooting.
Sometimes while you’re using the fill flash technique, you can accidentally generate the famous red eye effect. To correct this, you must set your camera in a way that it fires the flash before the shutter closes, giving a quick time fraction for the model’s pupils to contract.

Photo by Mansurovs
Exposure correction
This trick is really simple to explain and most of the times it works great. When you’re measuring a picture that has a lot of contrast, with highly illuminated objects facing obscure elements, the camera can be cheated and indicate that the exposure is correct when actually it’s not, so once you shoot the picture, you will obtain an even higher contrast level.
Why does this happen?, the answer is simple, your camera is trying to compensate all the light points and determine a midpoint to properly expose everything, this will turn out in correctly exposed objects next to dark parts with almost no details. To correct this and leave the important parts properly exposed you must execute a spot metering; if you look at your camera, you should be able to find a ‘padlock’ symbol, what this button does is locking the exposure. Use your camera’s zoom to visualize only the part you want to display correctly and then measure it, after doing this, keep the ‘padlock’ button pressed and zoom out, shoot the picture and you will see how the backlighting problem has been solved.
White balance
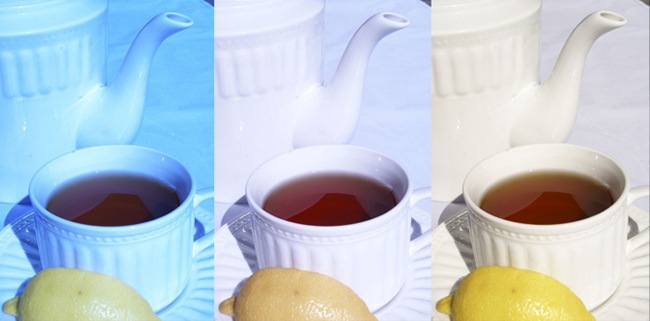
Even the simpler digital cameras tend to have this option incorporated and yet is minimum the amount of people that has ever used it despite of its importance. When taking photographs, you’ve probably noticed some scenes that look normal in your eyes and suddenly appear with a certain color halo on top of it when capturing with your camera, the reason of this lies on light’s temperature, which means that not all light sources look the same in front of the camera (our eyes are able to compensate this issue). If you have a fluorescent light, it’s probable that your pictures will have a tendency towards blue, while using a regular bulb light will add some orange atmosphere to your photographs.

Photo by Mike Small
Because cameras are not able to compensate the different light temperatures by themselves, you need to give them a hand using the white balance adjustment, currently most cameras come with preset options for the most common light situations such as tungsten, daylight, fluorescent or shade, let’s seen when you should utilize each one of these options:
- Auto: This mode works well for most occasions, though it will leave a soft blue or warm tone sometimes, in case that you’re using flash it’s probable that the camera will adjust to flash w/b.
- Tungsten: Using this setting will add a strong blue halo to the photograph. You can combine this with lower exposure values to turn daylight situations into afternoon-night moments.
- Daylight: This mode adds a soft blue halo and and is usually used in direct sunlight situations.
- Cloudy: Ideal for daylight events, it adds a nice warmer touch to your outdoors photographs.
- Flash: Similar to cloudy with a more intense red tone. This mode works specially well on Nikon cameras and compact digitals that tend to leave everything towards blue.
- Shade: Ideal for shooting in shade situations where things often tilt towards blue. This mode also works for those cases when most of the light is coming from the blue sky as the sun is being covered by clouds, it could also be useful for correcting backlighting situations.
- Fluorescent: This mode is helpful for those situations where your pictures get a greener tone. This mode counters the green tone by adding a cooling violet halo.
- Manual / Custom: In case that you are unable to fix chromatic aberration using the previous modes you can simply recur to this mode. The trick to make manual mode work is point at point that would normally look white, then you just have to adjust the values manually until you get the ideal aspect.
Additional accessories
In case that you’re looking forward to become a professional photographer, having a good camera plus a couple of nice lenses is not enough, you’ll also need to be prepared to face adverse lighting situations, which means that you’ll probably require some of these next accessories:
Strobes
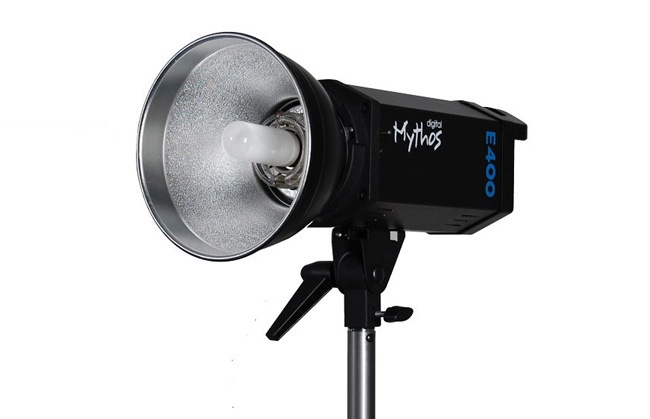
One of the most popular artifacts among photographers, strobes are lights that work just like your camera’s flash, with the big difference that they can be placed anywhere, giving you the chance to add lights and shadows wherever you want, making of strobes the perfect element for lighting a picture.

Because the strobe is linked to your camera, it will behave exactly (and better) as the built-in flash. You can combine strobes with different reflectors such as softboxes and umbrellas to create the perfect lighting for your photographs.
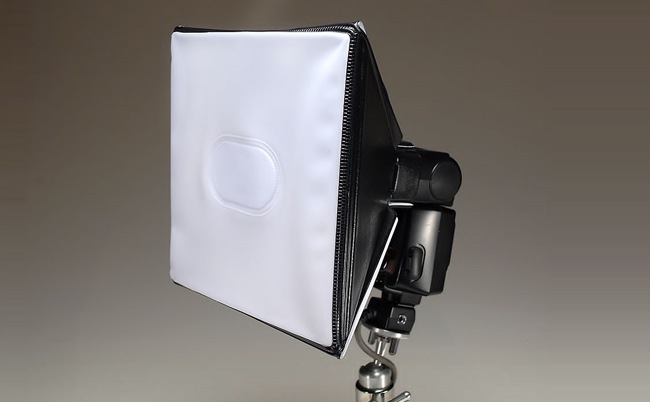
Softbox
An amazing light shaping tool specially designed for portrait photography, the softbox gives you control over how light is reflected. When you’re shooting in small indoors spaces, the softbox can help you keep light controlled instead of reaching every corner of the room. Using this element in studio photography will help you add a smooth lighting over the subject while keeping the rest as soft as possible.

There are different usages for softboxes, including spot lighting, fill light and hair light, just define what elements you want to enlighten and the softbox will help you do it. The larger the softbox, the softer light you can obtain, though it’s also more expensive than the smaller ones.
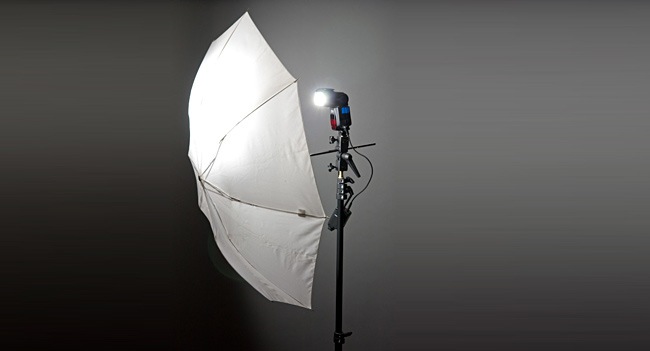
Umbrella (lamp reflector)
This type of reflector is known for its portability and mobility, as they present the same behavior of regular umbrellas. These reflectors are used to generate soft lights by enlarging the original light source while reducing its intensity.

You can find different types of umbrellas. First we have the shoot-through, which is a type of umbrella with a translucent white surface that allows light to fall right onto the subject. Another type we find is the reflective umbrella, which is an element that takes light and reflects it back onto the model. Some umbrellas have the quality of working as shoot-through and reflective.
Board reflectors
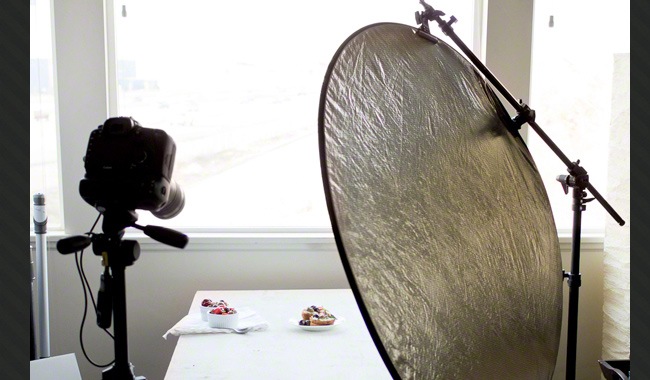
If you have seen fashion videos, then you have definitely seen these objects being held by assistants. Board reflectors are plane elements, easy to carry and used to reflect light and/or control higher contrast levels. Professionals often use this reflector as a replacement of the fill light technique to generate more natural portraits.

This type of reflector is utilized for grabbing the incoming light and redirect it towards the subject with more intensity and focus, you can usually find this reflector in gold, silver, white or black versions. A nice way of using this reflectors is point at some surface using artificial lights and then reflect this light onto the model, passing on the artificial light properties to the subject. For outdoors photo shoots, this reflector is utilized for reducing shadows and high contrast levels.
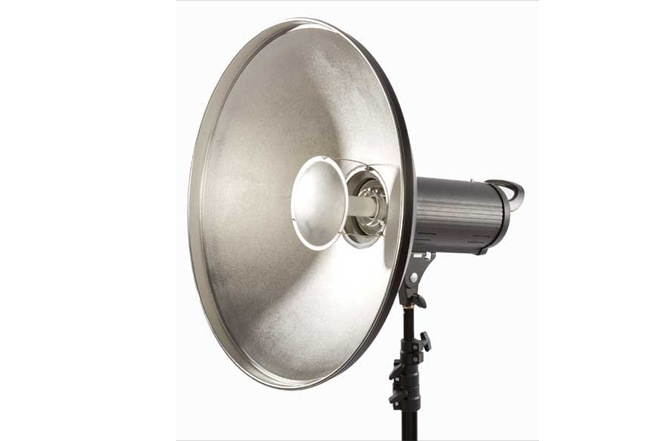
Beauty Dishes
These lighting elements consist in a dish-shaped light modifier often utilized in portrait photography. The name was supposedly given after fashion magazines where this dishes were often used in close-up photographs. The resulting light after using a beauty dish is softer than board reflectors but stronger than softboxes, which leaves it in a middle point where the photographer can find a lot of textures and visual richness.

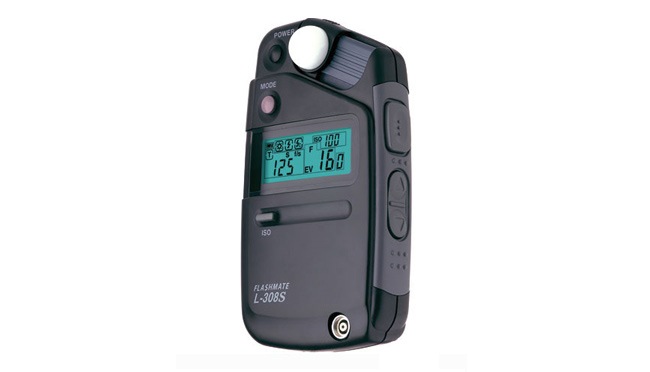
Light meter
Mostly utilized by professional photographers, a light meter is a special device designed for determine punctual exposure points within a scene. Light meters can be classified in two types, reflected and incident meters. Reflected-light meters measure the light reflected by the scene that’s about to be captured, this same system is the one that all cameras come with.
Then we have incident-light meters, which instead of measuring the light coming from the scene, they measure the amount of light that’s falling over the subject, you can recognize these meters by the white bulb that appears on top of them. To properly use this meter, you must place it next to the subject and place it facing the camera. Using light meters can help you have a better light control, though people have started to stop using them lately since they can fix subtle lights on their computers.

Photography styles
How’s the guide going so far?, don’t forget that you can leave all your opinions and suggestions at the Comments section. Now we’re going to talk about the different type of photographs you can work with and how to properly proceed for achieving the best results.
Although you can take different types of pictures with ease, the professional photographers often concentrate in an unique style and they become masters of it. Some of the styles you can find are fashion photography, landscape, night, sports and portrait, let’s see how they work.
Portraits
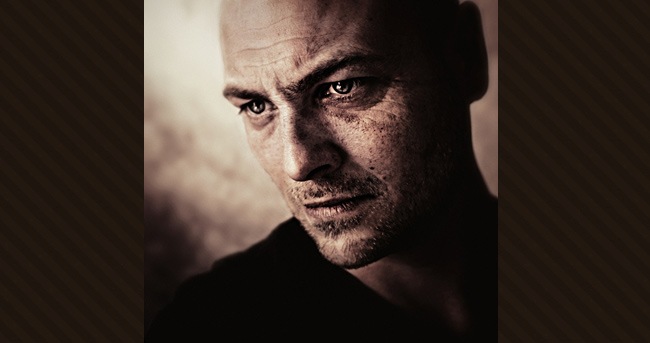
The first style we find is portrait photography. We have already explained most of the technical aspects you should know for taking good pictures, so we will try to concentrate less in the technique and more in the concept. Portrait photography is the art of capturing a person’s essence, not just his looks, which in order to work requires a good photographer and a great connection between him and the model.
Usually portraits focus on people’s face, though you can find some abstract styles that intentionally remove the face from the frame. The idea behind portrait photography is to unveil people’s personality, emotions and even thoughts; unlike fashion pictures, portraits are usually taken to normal people instead of professional models. In case that you’re capturing portraits without letting people know that they’re being photographed, we suggest you to use high shutter speeds for prevent blur from showing up, also a low aperture value around f/5.6 is recommendable as it separates the main subject from the background.
Tips for taking awesome portraits
One of the rule of thumbs in portrait photography is the three point lighting plan, which works like this: The photographer establishes 3 or 4 lights at different angles with the intention of capturing every detail of the model, by using this system you can generate smooth shadows and emulate natural lights with more accuracy.
In case that you’re shooting outside the studio you can experiment with different backgrounds to create different atmospheres and evoke different emotions, this can be useful because after all, plain backgrounds tend to be just boring and lack of emotion.
A technical tip regarding lenses is to opt for a prime lens. They have a fixed focal length and usually deliver the best quality. The images taken with them are very crisp and the aperture can go beyond normal lenses. In case that you’re planning on portray people that may react after noticing the photographer’s presence, we suggest you to employ a telephoto lens to capture the model while passing unnoticed.

Photo by Aleci
Another useful tip for taking great portraits is to play with people’s eyes. If the subject looks straight into the lens, the picture will generate a powerful connection between the model and the people who’re staring at the photograph. If the subject’s gaze is pointing outside the canvas, you can generate a sense of kindness and/or mystery that many people really like, you can increase this mystery feeling by capturing a strong emotion such as laughter. Another style is to guide the model’s gaze inside the frame, this will generate a stronger relation between the model and the object/subject he’s looking at, which can be useful for telling the story behind the picture.
You can tilt your camera’s angle to generate interesting compositions and add some movement to the picture. Another nice trick you can use is intentionally take blurred pictures to generate a vibe of dream and intrigue. At the end, what matters is to find your own style while still capturing the person through your camera.
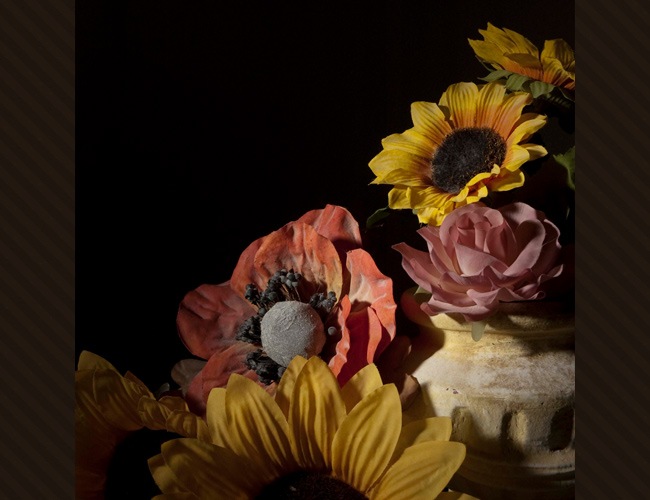
Still life
This is the ultimate test before you can call yourself an expert in lighting. Still life photography is the representation of quotidian objects that have been previously arranged to generate an appealing composition. Unlike other photography styles where the photographer finds a scene and decides which area he wants to represent, still life requires some basic notion about composition in order to generate an attractive piece. Before photography was born, still life was very popular among painters (and still is) and it was after this art that photographers adapted to make it work through their cameras.
Useful tips for taking still life photographs
Any kind of lens can be useful in still life photography except wide-angle lenses due the fact that they tend to distort the elements and mess up perspective. We also suggest you to slow down your shutter speed because after all, those apples are not going anywhere and besides, by reducing the shutter speed you could open the diaphragm which as we said previously, helps you generate selective focus photographs. Because you’re going to reduce shutter speed, don’t forget to use a tripod.

Utilize more than one light source. A nice idea is using a strong light pointing from one direction and a softer light place in front of it to add some fill into the darker parts of the photograph, also try to place the light in a non-frontal position, that will generate some really interesting volumes and shapes.
As we said before, the key for accomplishing successful still life photograph relies on lighting. Using strobes or tungsten lamps are great ideas, as they give you full control over direction, hardness and intensity to help you achieve the best pictures. Remember that every object absorbs and reflects light in different ways, objects such as bottles, crystals and jewels need a more careful process as they reflect light with more intensity.
Children
One of the most challenging things for a photographer is working with children, these little creatures move fast, are tireless and don’t like to follow instructions, so managing to dominate this technique requires a lot more patience than actually a science.
After seeing Jason Lee’s work and reading some of his articles, we discovered that the simple you keep things, the easier it will be for you to shot children’s pictures. Technically speaking we can only suggest you to use fast shutter speed to be able to match their constant wandering around, it could also be useful to shot multiple photos until you get the picture you’re looking for.
Tips for working with children
Although the magic of children photography lies on their spontaneity, it’s always useful to arrange some things before the photo shoot, which includes defining the best angles, determine the best hour, analyze how light behaves (you should work with natural light only) and make sure that the kids are ready for the session.
Because children are so uneasy, it might be useful to invite their parents and/or relatives to the photo shoot, they can help you out with the kids and can even become part of the session. Remember that these are not professional models and nor even grownups, so try to act like one of them by smiling, telling jokes and laying down on your knees so they can see you as an equal.

Photo by Mali
Unlike models, kids are not used to following instructions, so instead of telling them how to pose, show them how they’re supposed to pose so they can do it with ease. Another useful tip is adding props to the scene, these elements will help you keep the child distracted while you press the shutter. If possible, the best environment to work with children is outdoors spaces, so try to take them to the beach or the amusement park, that will make them happy and you will have the chance of shooting greater pictures, another reason why we suggest you to take the children outside is to avoid using tons of equipment that will probably scare the kid, remember that he’s not a model and you need to make him feel as comfortable as possible.
Working with children is a really pleasant activity, so take it easy and enjoy the time you can spend with him, if things go well between you and him, a beautiful picture will eventually come up.
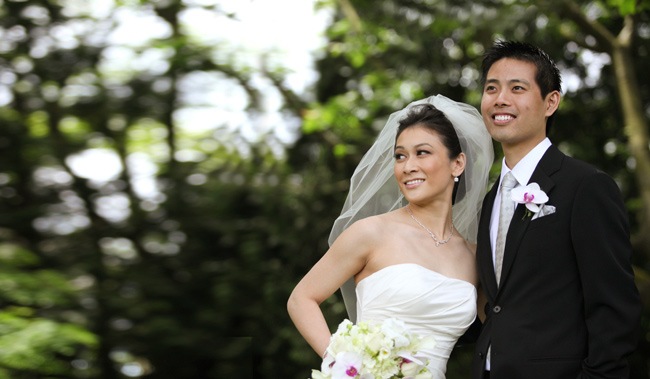
Weddings
The next category on the list and one where you’re always going to find at least one photographer working next to you is wedding photography, this happens due the fact that wedding photography is one of the most profitable areas on this field. Knowing how to shoot on these occasions will also give you the tips for working in any major event.
Shooting at weddings requires that you sharpen your ninja skills, because most of the guests will not be as patient as models and therefore you’ll be provided with only a few seconds to shot the perfect picture. An useful tip that will help you be as fast as a ninja is visit the location prior the ceremony, that way you’ll be able to find the best angles, test different lights and make sure that everything is on the right place, it could also be useful to set up a meeting with the happy pair to discuss the moments that they want you to shoot at and more.In case that you’re not the official photographer, you can shoot at different angles and try to capture awesome moments that the rest will probably leave unregistered.
Useful tips for shooting at weddings
There are some churches where taking pictures is restricted or at least not allowed from certain places, you can overcome this impasse by carrying with you a telephoto lens that will let you capture all the moments without having to get next to the groom and bride. Our suggestion is to always carry a normal/ wide angle lens along with a telephoto, that way you’ll be prepared for any thing that might show up.
Although is probable that you will be working under low light circumstances, is not advisable to activate the Flash unless you know how to use it without flattening most faces and details, instead of that, you should carry a tripod and work with low aperture values, you could also increase the ISO value but remember that higher ISO values tend to register more grain and noise. Because weddings are moments that people wants to remember forever is very important to capture all the emotions, so try to focus on the page boy’s movements instead of concentrating on the priest’s speech.

Basically you’ll have to take two kinds of pictures, portraits and group photos. Regarding portraits, try to make them as spontaneous as possible for really capturing the magic of the moment, we also suggest you a prime lens for taking this pictures. As for group photos, a wide angle is the best solution as it will help you capture wider photographs. Because is probable that the guests will not collaborate with you, the chance of taking a second picture are reduced, so you must plan things carefully before asking them to pose for you; another aspect that you’ll have to consider is light conditions, don’t expect people to pose just the way you want in order to get a correctly exposed picture, so at least try to make them pose sideways so they don’t start blinking.
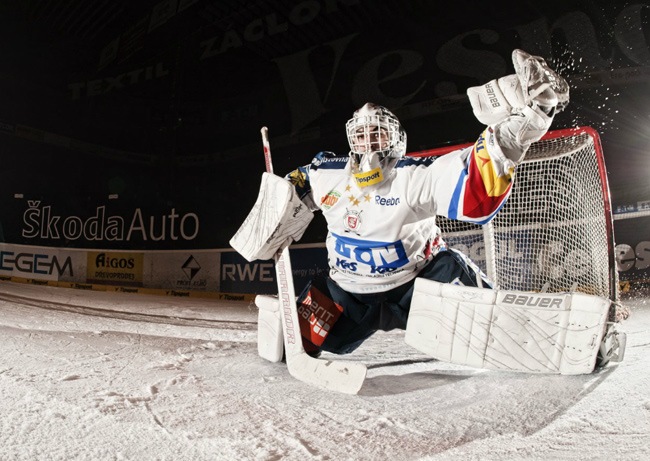
Sports
This is one of the most amusing kinds of photography, shooting at sports events will always give you awesome moments to shoot at, while enjoying an entertaining event. If you’re pursuing a photography career, this field can be really helpful as there are sports events being held at all time, so be always ready to run to the next major event.
Even if you don’t like sports, it’s highly important to understand all the rules, that way you’ll know where the key moments usually occur and you’ll be able to predict them. Although having a complete equipment can help you a lot, you don’t have to purchase a gigantic telephoto lens to capture a scene, just make sure that you have all the essential tools to be able to shoot at all moment.
Sport photography tips
Let’s talk a little bit about the technical aspects of sports photography. The first aspect you need to parse is whether the sports event will take place at night or day, on the outside or at some indoors coliseum, determining these aspects will help you decide the fittest equipment to take with you as well as how to approach the event. If you understand the rules in a sport, you can easily determine the best position to capture most of the important moments without having to move from one spot to another every once in a while.
If you’re working in low light events, you should have a lens that can use low aperture values of f/5,6 and even less, but in case that you’re shooting with daylight, try to shut down the diaphragm for obtaining a better depth of field. Regarding distance, a telephoto lens is the best solution, though having a normal (prime) lens can be really useful in case that the action arrives at your feet.

Photo by Dan Vojtech
Another aspect to assess is speed. Most sports involve some kind of fast movement, either if it’s fast sprints, quick high-kicks or instant responses, you must work with a high shutter speed in order to freeze the moment, however, you can experiment with slower speeds to give your pictures a certain movement sensation. Remember that no matter under what conditions you’re working with, you should always keep the ISO value as low as possible to obtain the finest quality possible. Flash can be useful in low light occasions, though you must remember that using flash can affect the athlete’s eyes and therefore you may get kicked out from the event, so in case that you have no option but to use flash, place it as far as possible from where the actions are taking place, also utilize some kind of accessory to diffuse the light.
Regarding composition, it’s important to always try to capture the strongest expressions and moments because those pictures are the ones that all newspapers like to buy. A rule of thumbs is to always try to leave some space on the side the sportsman is looking at, that will add a nice dynamic to the picture. If you feel that something important is about to happen, press the shutter and don’t release it until you’re sure that the climax has stopped. Another tip that usually works (though we know that will sound tremendously sensationalist) is capturing the frequent fights that occur between the sportsmen or their fans, these photos will always have someone to buy them for his journal. In case that the sport has additional elements such as gym ribbons or balls, try to include them on the photo to add more intensity to the scene, at the end, the key to success in sports photography is manage to awake people’s emotions after they see your photos.
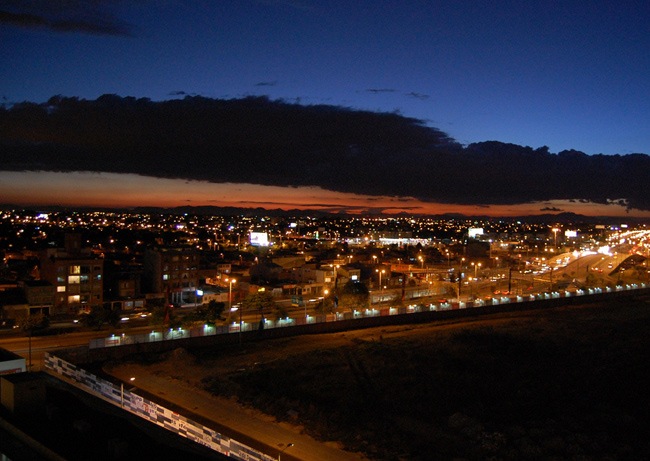
Shooting at night
One of the most beautiful techniques that every photographer should eventually explore is night photography. This technique takes advantage of the different natural and artificial lights that show up during the night to produce some of the most captivating photographs. You don’t need to have an advanced equipment to take good pictures at night, just a decent camera that includes a manual mode to work with.
The challenge that night photography presents is that there’s not too much light to work with, and you know that cameras need light to operate, therefore you’ll have to learn how to leverage every single ray of light for your benefit and therefore be able to obtain beautiful night compositions.
Useful night photography tips
Shooting at night is not as difficult as it seems, you just have to learn how it works and there will be no difference respecting daylight photo shoots. The first thing you should do is check if your camera is able to take RAW pictures, this format can be considered the digital version of negatives, so you can make lots of adjustments even after having taken the photo.

Photo by Julian Russi
As we said before, you need to harness every single ray of light to accomplish a decent night photograph, so the first thing you should always carry with you is a tripod, this element will help you hold your camera still during long exposure times, make sure that you place the tripod on a firm terrain so it will not tilt while the camera is taking the picture. Because the tripod will help you maintain the camera steady, you can shut down the aperture a little bit to obtain better details and less noise, also you can reduce the ISO value to obtain less grain on the final result. If your camera comes with an image stabilization mode, it might be better to turn it off as the tripod is already keeping the camera steady and the stabilization sensor might cause the camera to move.
Because light conditions will not be favorable, your camera will be in trouble while trying to use the autofocus, so in this case it’s better to focus manually and well, if you miss the sharpest angle for a little, you can always use Photoshop to correct the problem. Regarding white balance, you could experiment with the different options until you find the look you want, usually the daylight mode delivers some of the most compelling results.
Popular Photography software
Before the era of digital photography, processing pictures used to be a delicate task that not everyone was able to do, from choosing the best revealing emulsion to keeping your fingers out of the paper, processing photographs was a complex art that required a lot of practice and knowledge. Now photographers can worry less about these technical problems and focus on the image, because along with the arrival of digital cameras, a wide range of processing programs have emerged to help photographers work with their pictures.
But these programs not only recreate what was previously made on the dark room, they offer tons of great features that were difficult to achieve in the past, so things such as adding blur, sharpening or correcting skin are now part of the lexicon. Although mastering these programs still require certain skills, it’s not as difficult as leaving the dark room with a satisfaction smile.
Photography applications range from amateur tools such as Picnik (though we have seen some pretty cool things coming out from this editor) to advanced programs such as Photoshop or After Effects. Some of the tools that these programs come with can help people crop, rotate and resize pictures, which indeed can be made automatically or in a professional way. Programs like Photoshop can help you remove undesired elements, correct red eyes and many other great things that were previously cumbersome.
The problem with these programs is that now any person who has Photoshop installed on his computer thinks that he can be a professional photographer, that’s the reason why even though astounding photographs are appearing with more frequency, hideous images are also bombarding us every day with their artificial hair colors, vintage obsession and weird photomontages. Another problem that has appeared with these programs is that photographers are abusing their use, things like correcting exposure or sharpening are good, but adding filter after filter, creating artificial depths of field or turning everything towards sepia is just not right. Now it’s difficult to find natural pictures that haven’t been touched by Photoshop, everything has become a search for perfection that is affecting the essence of photography itself, however we can’t deny the great contribution that these programs have made to the industry, so let’s talk a little bit about some of the most popular photography programs.
Adobe Photoshop
The photography edition program by excellence, Photoshop is a graphics editing program developed by the Adobe house, the program is used by millions of people around the world, from professional designers and photographers to occasional users, Photoshop has become one of the most famous image editing programs in the world.
With the release of the latest CS5 extended version, Photoshop has become a powerful tool that does practically everything when it comes to image editing, including adjusting color, removing spots or adding effects. But Photoshop is more than just a photo editor, this program is often used by designers to create beautiful publications, web pages and even 3D artworks. Because the program is pixel-based, the artists also make use of Photoshop to create the popular pixel-perfect technique.
Photoshop gives support for several color formats, giving you the chance of work for digital or print mediums, these color modes are RGB (digital), CMYK (print), grayscale, binary bitmap and duotone. The program is also able to process many file types, including .EPS, .JPEG, .PNG, .GIF, .TIF and more.

Adobe Photoshop Elements
But because not every person needs to have all the powerful features of Photoshop, the guys from Adobe have released simpler versions of the program with all the basics to help the average user manipulate and edit his photographs. The first of these programs is Photoshop Elements, a program that features all the Photoshop basics with fewer and simpler options, the program is cheaper than the full Photoshop version, making it an ideal choice for most users.
The program was introduced since Photoshop 7, focusing on helping casual photographers and occasional users to edit pictures for digital applications, the program is not able to export CMYK versions after the initial installation, though you can install a small plugin that will let you do this. The latest editions of Photoshop Elements can help you open PDF files and employ a few additional tools of the complete PS version.
Adobe Photoshop Lightroom
One of the most popular programs among photographers is Photoshop Lightroom, this program can be considered a combination of Adobe Bridge (Adobe’s Browser) and Photoshop’s basics. The program was originally developed to aid Photoshop users managing large amounts of digital pictures and quickly make post production work, the program features an user-friendly interface that lets you easily browse, edit and manage large image batches.
The program lets you organize files with ease, edit RAW and JPEG files, run slideshow presentations, set up for print and instantly upload single images or galleries to the Internet. Lightroom is definitely a great tool for photography purists that want to keep things as closer as possible to the original.
Adobe Photoshop Express
And the last member of the Photoshop family is Express, a Flash-based image editing application that helps you edit photos directly online, allowing you to work with pictures from blogs and social networks without having to download them. The application is still in a beta phase but is already offering support for places such as Facebook, Flickr, Picassa and Photobucket.
This application promises to become a very useful tool for editing pictures online, it currently includes many great tools such as soft focus, black and white, effects, sketch effect and more.
GIMP
Probably the strongest competitor of Photoshop nowadays is GIMP (GNU Image Manipulation Program. GIMP is a free image editor used for image editing, it includes most of Photoshop’s essential tools to help you edit all your photos. GIMP is currently supported in Windows, Mac and Linux.
Despite of being a free application, GIMP is a powerful image retouching tool with some nice features that help you resize, crop, combine and convert different image formats. Although GIMP is currently being used mostly by web designers, some photographers are starting to experiment with it.

Aperture
Apple’s image-editing solution is Aperture, a photo editing program that helps photographers execute post production work, organize image files, generate slideshows, print photographs and more. Aperture includes some pretty cool features such as non-destructive editing, file’s organization by keywords, face detection and GPS integration.
The program includes many of the classic Photoshop features such as dodge, burn and skin treatment. You can purchase Aperture on the Mac App Store. Additional features include Facebook and Flickr export, 64 bit application and more.
There’s a plethora of image editing programs out there, we’ve just mentioned the most relevant. If you want to check more of the options that can help you work with pictures, make sure you check this next article from Wikipedia.

Advanced techniques
Now we have reached the final section of this article dedicated to advanced photography and photo editing techniques. These tips will help you obtain some of the most beautiful photographs and become a Photoshop professional in the process, if you know any other technique that we should include on this section, please leave us a comment or find us via Twitter / facebook, now let’s take a look at the top photography techniques and the secrets behind their making.
Some of these techniques are adaptations to old school techniques, though most of these items have been developed since the advent of the digital photography era. New processes are being developed all the time, so in the meantime, here’s a small list of some of the most popular and useful techniques nowadays.
HDR
One of the most recent and controversial techniques in photography is HDR. An acronym for High Dynamic Range Images, the HDR technique is an amazing way of combining different exposure values of a single photograph to generate an overwhelming picture that almost emulates how things are actually seen by the human eye.
Many people have criticized HDR as they consider it an exaggeration of digital intervention that transforms photographs in painting-like artworks, moving aside from the photography field itself. Despite of all the rumpus that this technique has generated among photographers, many people consider HDR as a beautiful way of conveying real life scenes in a way that has never seen before.
Although there are currently many applications for mobile devices and computers that can automatically emulate the HDR technique, creating an actual HDR image requires a series of tools and skills that not everyone knows about. In case that you are a smartphone user and you want to experiment with HDR-like pictures, these are some of the best mobile apps nowadays:
The first concept you need to understand is bracketing, which is the word for describing the process of taking multiple shots of a single scene at different exposure values, many D-SLR cameras come with an auto-bracketing function that makes things easier for the person, anyway, you can make a manual bracketing with any camera that lets you manipulate the aperture and/or shutter speed values.

Photo by Alpha Oren
HDR usually works with three main pictures, one overexposed, one normal and one overexposed, once you have these three pictures, you’ll need to use a photo editing software for merging the pictures into a single image, in our personal experience the best program for this purpose is Photomatix Pro.
You have two options when working with Photomatix, exposure fusion and Tone Mapping. Exposure fusion basically grabs the three pictures and generates a well exposed image, this can be useful for those cases where you don’t want to obtain HDR results but just correct some exposure errors. As for Tone Mapping, this is how HDR pictures are usually made, you’ll need to manually adjust the controllers until you have the result that you’re looking for.
Of course you can make further adjustments in Photoshop such as removing the brilliant halo that usually shows up after processing bracketed pictures, this can be done combining the Dodge and Burn tools. So basically, this is how HDR photographs are created.
Focus stacking
There’s a nice technique that you can combine with HDR to generate even more realistic photographs. Focus stacking is a digital process where multiple shoots of a single scene are taken at different focus distances and then combined to obtain a high depth of field, this technique is specially useful for macro photography.
First of all, you must establish a fix point to shoot at and then press the shutter multiple times while changing the focal depth, then you can store those images in your hard drive and mix them to obtain a perfect picture, this trick is specially useful for the photographers that don’t have macro lenses among their equipment.

Now that you have taken the different photographs you’re probably wondering “How am I supposed to blend these together?”. Fortunately we have the all mighty Photoshop to do the job for us. For start, import all the pictures in a new Photoshop file, make sure that every picture is on an independent layer, then choose all the layers and go to Edit > Auto-Align Layers, on this window you must choose Projection: Auto and Lens Correction: Geometric Distortion, hit OK and now all the layers will be perfectly aligned.
Whilst all the layers are still selected, go to Edit > Auto-Blend Layers, select Stack Images and check the option that says ‘Seamless Tones and Colors’, press OK and wait until Photoshop processes this. Once the process is completed, you will have a perfectly focused picture.
Note: You can also use take advantage of the Auto-Blend Layers option to generate panoramic pictures, just choose Panorama instead of Stack Images.
Infrared
One of the oldest techniques in photography that has been reinvented during the digital era is infrared. This technique was discovered while using special films or image sensors to detect infrared light during the dawn of the 20th century. Infrared is the light spectrum that the human eye cannot detect under regular circumstances, once the light reaches the camera, all the visible light is suppressed, while conserving the infrared spectrum only.
Nowadays you can find many filters that can help you register the infrared light on your camera, helping you obtain some of the most beautiful photographs ever. Although the normal way for obtaining an infrared picture is acquiring the special filters, you can use Photoshop to emulate this technique, so let’s see how that works:
First of all, this trick works better with bluish images, the reason for this is that blue usually does not change when taking infrared photos. The first thing to do is duplicate the picture and invert its colors (Ctrl + J, Ctrl + I), then switch the blending mode of the duplicate layer to color.

Photo by Chun Lo
Now go to Layer > New Adjustment Layer > Channel Mixer and do the following adjustments: In the red channel, move the red slider to 0 and the blue slider to 100; on the blue channel, move the red to 100 and blue to 0, finally, on the green channel, make sure that the green slider is set at 100. The next thing to do is go to Layer > New Adjustment Layer > Hue and Saturation and select the red channel, reduce the saturation and play with the lightness and hue values until you obtain a yellow tone instead of red.
For the next step, go to Layer > New Adjustment Layer > Photo Filter and choose one of the cool filters, reduce its opacity to somewhere around 25 %, then hit OK. Finally, create a new layer and go to Image > Apply Image (this is just another way of duplicating an image), use this layer to add blur to the water and clouds that appear on the picture, remember that original infrared pictures are obtained through long exposures, thus the clouds and water should be smoother than usual.
Vintage
Popular among graphic designers and fashion photographers, the vintage style emulates the old photograph styles by using washed color palettes, vignettes and sepia-like tones. You can adjust your camera to take vintage photographs by adjusting the white balance parameters, however, to accomplish a better vintage effect, you’ll have to appeal to Photoshop once again, so let’s see how it works.
Create an adjustment layer (Curves) and tweak the red and green channels emulating a letter ‘S’, then grab the blue channel and do exactly the opposite, that will adjust the tones closer to the vintage look.

Photo by Erin Johnson
Create another adjustment layer (Hue and Saturation) and reduce the saturation a little bit to wash the colors. Proceed by adding a solid color layer on top of the rest, select a magenta tone for this layer and reduce the opacity to 4 %, adding this layer will emulate that subtle pink glow that old photographs used to have.
Finally, go to Filter>Lens Correction to add a subtle vignette to our photograph, in case that you have old Photoshop versions you can use the selection tool and create an ellipse, then invert the selection, increase its feather to somewhere around 27, fill the selection with a dark sepia tone (works better than black) and reduce its opacity until you like how the vignette looks.
Tilt-shift
Tilt-shift is another popular technique that consists of using camera movements and selective focus to simulate miniature scenes. This trick has become so popular that now many cameras have their own tilt-shift mode that lets you either take or post-process photographs and obtain a tilt-shift look.
To achieve the tilt-shift effect manually you’ll have to rotate the lens plane (tilt) and move the lens parallel to the image plane (shift). This technique can be a little tricky if you want to make it manually, so let’s see how to emulate it in Photoshop instead, though as we said before, most D-SLR cameras now have their own tilt-shift mode, so this tip only works for those who don’t have a D-SLR.

After opening the picture, go to the Quick Mask Mode (Q) and select the Gradient Tool (G), make sure that the type of gradient you’re working with is Reflected Gradient. Then you must experiment until you manage to mask everything but the part you want to leave intact. Now hit Q to exit the Quick Mask mode and activate the selection, proceed by clicking on Filters > Blur > Lens Blur, switch the iris mode to Octagon and play with the controls until you have the result that you’re looking for.
Finally, you can release the selection and increase the saturation a little bit to make it look less real and more like a miniature. So that’s it, now you know how to easily emulate the tilt-shift effect in PS.
Chroma Keying
Although this is more a filmmaking technique, Chroma Keying is also utilized in photography. Chroma Keying uses a specific color (usually blue or green) behind a subject or object to later remove it and place another background instead, the reason why blue or green are the most employed colors on this technique is because they offer high contrast in front of the average human skin color, however, many experts prefer blue over green as it’s easier to hide.
A successful Chroma Keying technique is when all the background color can be removed without affecting the subject, though there are some experiments such as Jim Carrey’s latest appearance on the MTV Movie Awards where he used green overalls while he made a quick intervention on the show. It’s very important that the green/blue background is properly illuminated so it looks like a single color and not multiple tones because that will make the removal process harder than normal. It’s also important that the subject is far enough from the background to avoid accidental shadows from showing up.

If you make a good lighting process during the photo shoot, the rest will be a piece of cake, you’ll just have to grab the Magic Wand tool and remove the background. One problem that might show up is color spill, which is basically a blue/green reflection over the subject, on this case you’ll need to adjust the lighting, though if the picture is already in Photoshop you can use the brush tool to remove the tones with smoothness. An useful product you can use is a matte spray, which reduces the subject’s reflecting properties and therefore the color fill, this can be specially useful when you have bald models.
Zoom Burst
One of the nicest and yet easiest techniques in photography is called zoom burst. The only thing you need to make this effect is a zoom lens that lets you change the focal length. On the zoom burst technique, the focal length is changed while the photo is being taken, the trick works both with zoom in or zoom out, so it’s up to you to experiment and decide which one looks better.
To be able to make a zoom burst is advisable to use not so fast shutter speed, values around 1/15 work great. We suggest you to use a tripod while making this experiment because your hand will probably make the camera to shake, messing up the effect (though other great photographs can be achieved this way). If you want to make a more professional zoom burst, try to keep some elements in permanent focus, this can be achieved by placing them at the center of your frame or if you want to be riskier, you can manually focus.

It’s amazing to experiment with zoom burst using your camera, however, if you don’t have a zoom lens to work with you can import your pictures to Photoshop and go to Filters > Blur > Radial Blur and choose zoom, this little trick will let you emulate the zoom burst effect.
Bleach Bypass
Also known as skip bleach or silver retention, bleach bypass is a traditional photography technique that skips the bleaching function during the processing of a color film to prevent the silver from being removed from the emulsion along with the color dyes. This trick generates a black and white picture on top of a color image, bleach bypass photographs usually have reduced saturation and strong contrast values, it’s also usual to find some grain on these images.
Because making the original process is currently expensive and unnecessary, you can emulate the bleach bypass effect in Photoshop. First of all open the picture you want to edit and duplicate it, then hit Ctrl + U to access the Hue/Saturation panel and remove the saturation to obtain a grayscale picture, then select this grayscale layer and duplicate it.
Select this new copy layer and switch its blending mode to ‘Screen’, then reduce the opacity value to somewhere around 50 %.

The next thing to do is select the original layer (color) and duplicate it, then drag this layer to place it on top of the two grayscale layers. On this part you must select between Overlay and Color Burn, choose the one that makes your photo look better, after that, reduce the opacity value of this layer down to 75 %.
And now select all the layers and merge them into a single one, then go to Filter > Noise > Add Noise and choose monochromatic and Gaussian, as for the noise amount, do not choose a value beyond 5 %.
Awesome, now go to Filter > Sharpen > Smart Sharpen and choose a value around 60 % in Amount, Radio value around 1,5 %, Remove set to Lens Blur and check the ‘More Accurate’ option.
Finally, go to Filter > Lens Correction to add a subtle vignette around our photograph. And that’s it, now you know how to easily emulate the Bleach Bypass technique in Photoshop.
Note: If you want to add this effect to your mobile pictures, there’s a nice app specially designed for the iPhone named Bleach Bypass.
Multiple Exposure
This is a fun technique that will help you surprise your friends when you tell them about your missing twin. Multiple exposure is a photography technique where two or more individual exposures are made to create a single photograph. The exposure values might or might not be identical to each other.
Originally, multiple exposure images were created after shooting at low shutter speeds (more than 1 second), the photographer pressed the shutter and then he covered the lens for a time fraction, during that moment, a person or object was be inserted into the scene, that way the final shoot will display two individual objects in a single shot, this technique was mostly utilized for fun or experimentation, now many people are using this to create some pretty cool designs and advertisements.

Photo by Dave & Charlotte
Even today, this technique can be easily done using your camera only, though if you prefer to sit down in your desk and use Photoshop, we can explain to you how to generate multiple exposure images. On this case, instead of generating the effect through your camera, you must take independent pictures and then merge them in Photoshop. Once you have the pictures you want to use, import them in Photoshop as individual layers, an easy way for doing this is go to File > Scripts > Load Files into Stack, that way you’ll have all pictures automatically imported in Photoshop, you should also check the option ‘Attempt to automatically align source images’.
Unfortunately, there is no effective method for automatically merge all photos in Photoshop (there are other programs such as GroupShot that may help you do this job with ease). The best way of doing this is taking all pictures using a higher exposure value, that way you can switch the blending mode to Multiply and all the layers will not only generate the double exposure shoot but also correct the exposure itself. In case that doing this leaves you a extremely dark photo, there’s no other option but to mask the objects that will be part of the composition and remove the rest, make sure that you use smooth brushes and feather to make the erasing process as subtle as possible.
Harris Shutter
This is another manual technique that has been adapted to digital photography. This technique consists on taking successive photos using three different color filters, doing this while keeping the camera steady will generate a certain color halo around the objects that were moving whilst the picture was being taken. This technique works amazing over water, clouds, animals or people.
In the past, achieving the Harris Shutter effect required a camera that was able to take multiple exposures while changing the filters, this was a little bit complicated and therefore, not many people used to try it. Now with digital technology, the Harris Shutter can be emulated with ease, let’s see how it works:

Photo by Viv-Leoni
First of all you need three photos of the same scene taken within little time intervals, the reason for doing this is that the movement elements will be the ones that the Harris technique will place its effect over. Import the images to your hard drive and then place them in Photoshop as separate layers.
Now, select the first layer and go to Image > Adjustments > Color Balance, move the Red bar towards +100 and the others towards –100. After this, do the same thing with the other two layers but instead of enhancing the red, move the green and blue channels respectively.
Finally, select all layers and switch the blending mode to ‘Light Color’, that way you’ll be able to see the three pictures as one, now you know how to easily emulate the Harris Shutter effect.
Final thoughts
Photography is a beautiful art that has been explored by hundreds of enthusiasts and artists, don’t forget that even the most expensive camera is not capable of shooting good photographs by itself, all the tools and gadgets are destined to make the photographer’s life a little easier but never to replace him. Only practice will give you the experience to become a good artist behind the lens, so don’t hesitate and start shooting right now, there’s a lot of beautiful things and moments out there waiting for being captured by you and your camera.
And on this way we have reached the end of this article, a complete photography guide that will give you all the essential tools that you might need in order to become a professional photographer, coming soon we will be discussing some of these points in more depth, so stick with us! and don’t forget to leave us all your comments and suggestions, thanks for stopping by and we’ll see you all next time.

